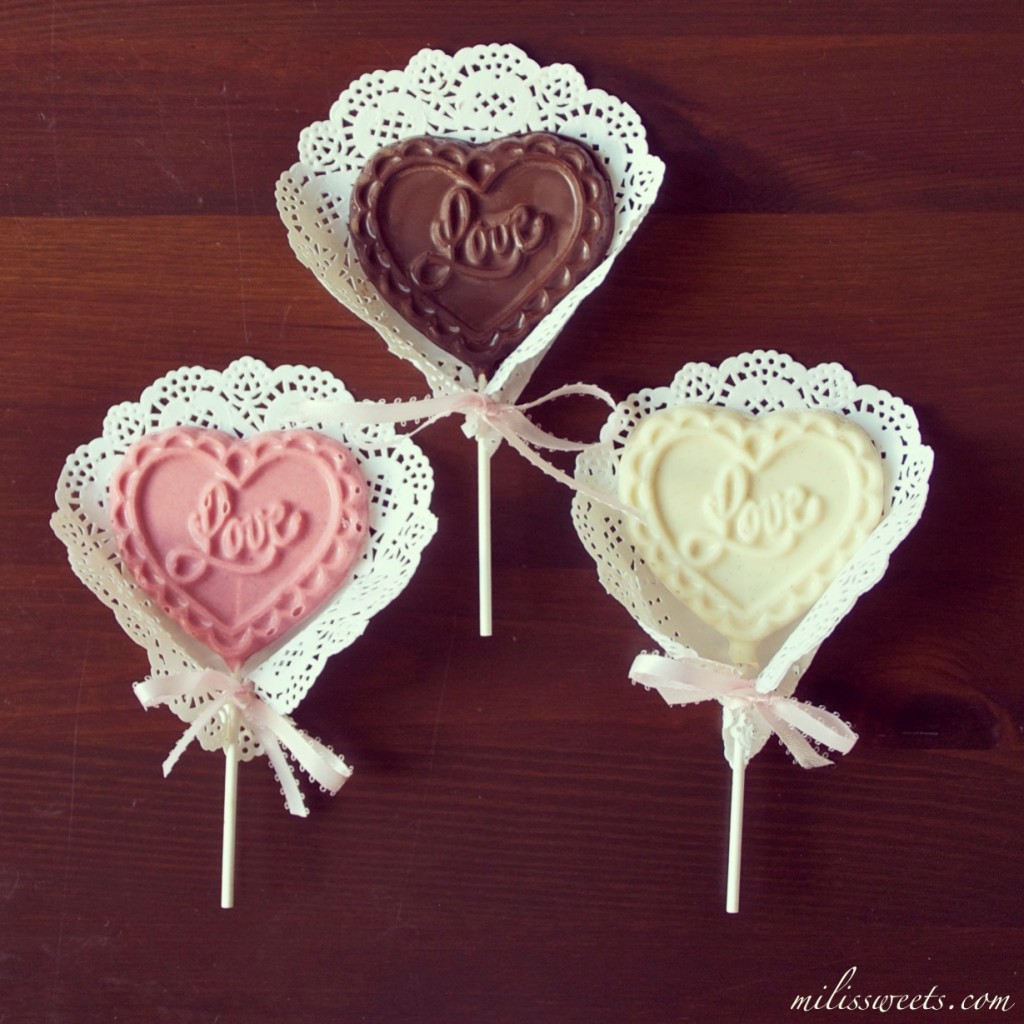
We wanted to take our sweet time while making Valentine’s Day treats this year. We decided to make these adorable heart-shaped pops in both dark and white chocolate. Here’s a peek at the easy-breezy way to make them. My daughter made it happen and they turned out so cute!
(I love looking back at how little my baby girl was when this posted!) xox
This is a super simple and cute project – especially with the doily and ribbon packaging. I’m sharing the tips and tricks for making chocolate pops, along with the recipes for tempering and candy-making with chocolate.
I admit, the dark chocolate version of these pops are a breeze to make, while the white chocolate version is a little more difficult. It’s also about personal preference. For me, the darker the chocolate, the better.
Mili’s Sweets White Chocolate Pops
Here’s what you’ll need:
1 cup white chocolate chips
2 teaspoons organic, all vegetable shortening
tools: saucepan, glass bowl that fits at the top of saucepan, small offset spatula, silicone spoon or spatula for stirring chocolate, candy mold of your choice, lollipop sticks, parchment paper
A little background on what we are working with: I think it’s important to have an understanding of where our food comes from, or how it is made. White chocolate will be a little more time consuming to temper since it doesn’t melt quickly, as chocolate does. As a matter of fact, it’s not actually chocolate at all, since it doesn’t contain cocoa solids. Instead, white chocolate is made of cocoa butter, milk and sugar. Most all white chocolate will also contain a solidified form of (typically) hydrogenated or non-hydrogenated vegetable or animal fat (shortening).
I tend to stay away from working with shortening in my cooking and baking. It’s something I wasn’t raised with and prefer not to use. For example, I’ll never use it when making chocolate truffles or biscuits. However, it is very useful when working with chocolate and there is a need for a protective coating to resist smudging or excess moisture. I use it for some chocolate candy-making (like this project) and when tempering chocolate for dipping treats like cookies and strawberries.
Here’s what you’ll do:
In the sauce pan, bring a small amount of water to a very low boil. Once it’s reached the point of small bubbles around the water rim, make sure your heat is set to low.
Place the glass bowl on top of the low-boiling water, with the chocolate chips and shortening placed inside.
With a silicone spoon or spatula, stir the chips. You’ll notice there seems to be a lot of additional moisture in the chips. Be patient and continue stirring to melt and break down the chips. Eventually you’ll have a smooth texture. As soon as you see no lumps, remove the bowl from the saucepan.
You’ll want to work quickly with white chocolate so that you can use it in a semi-liquid form, before it starts to cool and solidify. Have your candy mold ready with the lollipop sticks in place. If you are going to use color or edible glitter (luster dust), now will be the time to add it in.
White chocolate is more dense than actual chocolate, so you’ll need to spoon portions into the mold shapes.
Next, press the chocolate in, using a small offset spatula. You’ll do this to fill in each crevice of the mold. Then, use the offset spatula to scrape the excess chocolate, with the outside edges of the mold shape as your guide.
Refrigerate for 10 minutes.
Once the chocolate has finished setting in the refrigerator, you can literally “pop” out the chocolate pops. Invert the mold over a piece of parchment paper and use your thumbs to gently push out each pop.
Then, hold each pop with one hand and use the body heat of your thumb, to smooth out the excess chocolate along the edges. (You’ll find that it takes a tiny bit of pressure to do this with white chocolate. The higher percentage of the cocoa in the chocolate you use, the faster it will melt to the touch.)
You’re done! Now, let’s talk about working with dark chocolate (my favorite) and then I’ll give you some tips on making a pretty presentation.
Mili’s Sweets Dark Chocolate Pops
Here’s what you’ll need:
1 cup dark chocolate chips (I used 60% cocoa)
1 tablespoon organic all vegetable shortening
tools: You’ll need to use all of the same tools listed above in the white chocolate tempering recipe, except this time, you won’t need the use of an offset spatula. Once melted/tempered, dark chocolate is much smoother and less dense than white chocolate, so there’s no need to spoon it into the mold. This time, you’ll want to have a plastic bag to pipe the chocolate into mold shapes.
Here’s what you’ll do:
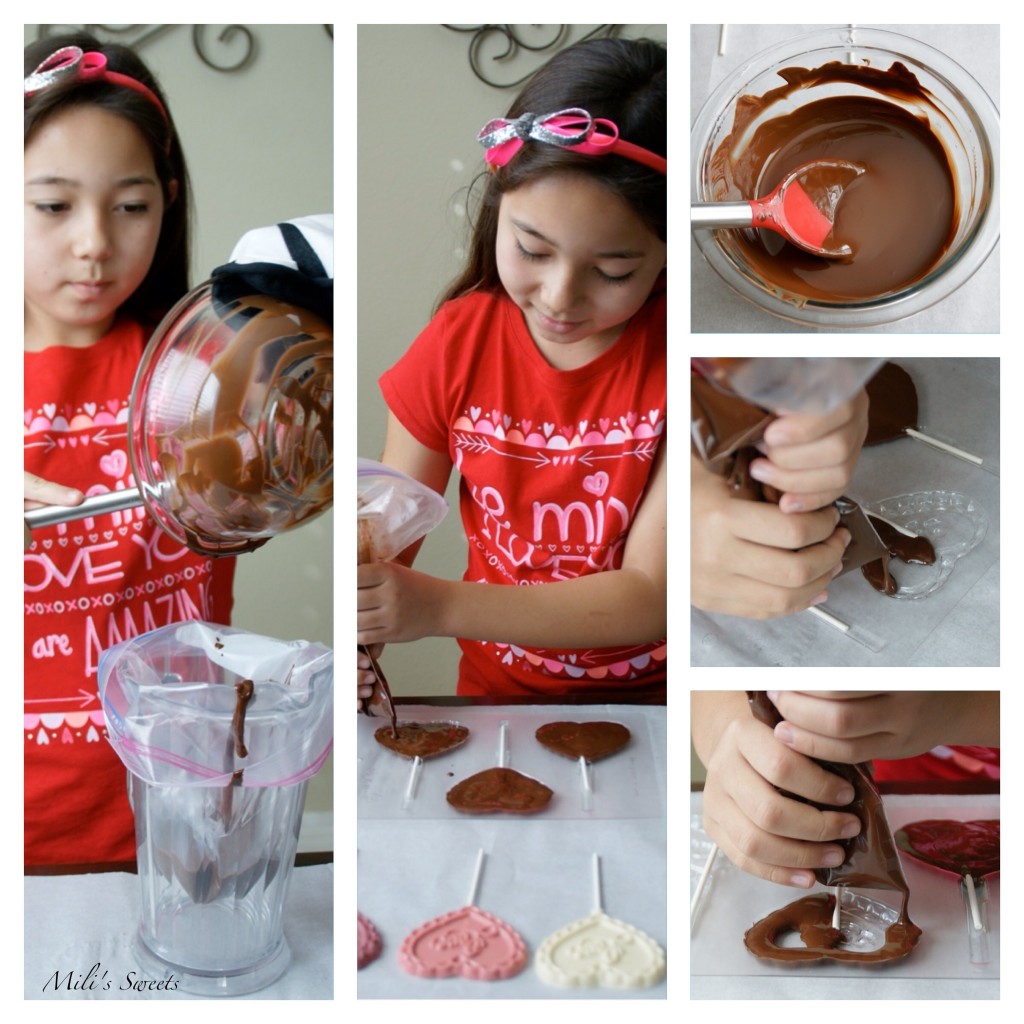
My sweet girl was such a pro at this version! As I mentioned above, real chocolate is such a breeze to work with.
As noted above to temper chocolate, have a saucepan with a small amount of water, set to a very low boil. Once at this temperature, keep the stove at low heat. Place the chocolate and shortening into the glass bowl and place the bowl on top of the pan.
Begin stirring right away. You’ll notice that the chocolate will start to melt immediately and you’ll have no lumps in no-time. Once it’s perfectly smooth, remove the bowl from the heat.
Make sure your mold has the lollipop sticks in place. Then, prepare your piping bag.
This is a tip I’ve shared with you before: When you need an open bag to pour in liquids or batters, use a standard sized plastic pitcher and fold a gallon-sized plastic bag over the edge of the pitcher so that it stays in place.
Next, close the plastic bag and use scissors to cut a small hole at one of the bottom corners of the bag. Use it to pipe the chocolate all around the edge of the mold shape first, and then toward the center.
Refrigerate for 15 minutes.
Pop them out, as per the instructions and photo reference shown above. Use your thumb to quickly smooth the excess chocolate from the edges of each pop.
Here are a couple ideas to make them pretty and ready for gift-giving:
If this is a treat to distribute to a large number of friends, I recommending purchasing small cellophane bags, and closing them with either ribbon or wired twist ties.
For the doily version, take a small, circular paper doily, that is a little larger than the size of the chocolate pop. Loop ribbon into two holes around the center-bottom of the doily. Place the pop in the center and tie the bow around the bottom. If you are transporting these, I recommending placing a small piece of parchment paper between each pop.
This treat is too cute not to LOVE! The best part is, you and your sweethearts can make them (and enjoy them) together.
Happy Valentine’s Day!

