Master Dough (traditional recipe from Italy) for making Focaccia, Pizza, Calzone, and Frittelle
This recipe has been passed down from my grandmother who learned this tradition from the small town of Tricarico, Italy. My mother learned it as a child there and has passed this tradition on to me. It can be used for bread. However, this specific dough is for mainly making bread-like pizza called focaccia. It can also be used to make traditional style pizza and frittelle (Italian fry-bread).Timing: This recipe-process takes about 8 minutes for the ingredients to come together to form a proper dough, from start to finish. It will require an hour of time to rise, before it is ready to cook with. This recipe will yield enough finished dough to make two focaccia, about 4 pizzas and several frittelle. For storage: You can refrigerate or freeze the dough that you don't use after it has risen. If you have not baked refrigerated dough after two days, tightly cover and wrap it to be kept in the refrigerator for up to two weeks, or in the freezer for up to three weeks.
Ingredients
for activating yeast
- 1 and 1/4 cup water warmed to 115-120 degrees
- 2 and 1/4 teaspoon active dry yeast (one package)
- 1 teaspoon granulated sugar
dry mixture inside large bowl
- 8 cups all purpose flour
- 2 teaspoons coarse kosher salt
to set aside for kneading
- 1 cup all purpose flour
- 3 cups water - warmed to 115-120 degrees
Instructions
preparing the yeast
- First step is to prepare the yeast. Warm up between 1 cup, and 1 and 1/4 cup of water over the stove or microwave so that it comes to 115-120 degrees.

- Pour in yeast and sugar. It is not necessary to stir.
- Cover completely and set aside for 10 minutes before using to make the master-dough. The yeast will look activated and alive with a foamy, bubbly top.

preparing to make dough
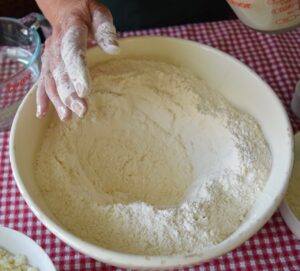
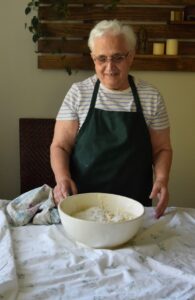
- In a large bowl combine: 8 cups all purpose flour, plus the two teaspoons of coarse, kosher salt.
- set aside the following: a) 3 cups of warm water (also at about 120 degrees) in it's own container or bowl that your hand can fit into, b) 1 cup of all purpose flour, and c) the activated water-yeast
kneading the dough and preparing it to rise
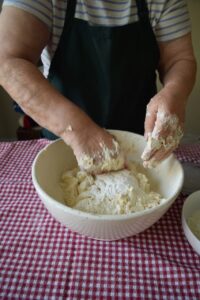
- Make a well in the center of the bowl.
- Pour in the entire contents of the water and risen yeast.
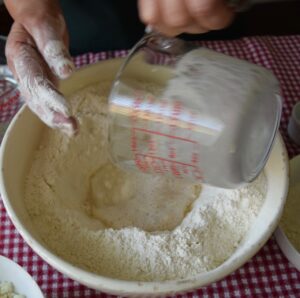
- With one hand, and in a circular motion, work the flour into the water.
- Combine all of the water from the well into the flour. Now there is no more well/pool of wetness.

- Once the well/pool has soaked-in, pour in between 1/2 and 3/4 cup of the reserved water to the top of the mixture. Try to get all of the flour centered and into the mound you are working with.

- By now, all of the flour is all in the mound but it is not wet enough. Add about a 1/2 cup more of the reserved water.

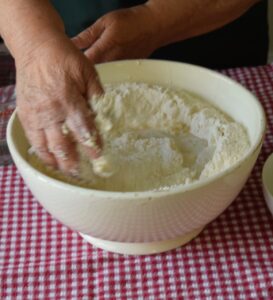
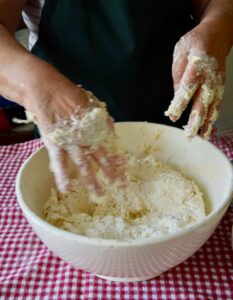
- Now is the time to use both hands to start punching and kneading this into dough. The goal from this point forward is to help the yeast to flourish. Keeping both hands in-motion will preserve the warmness of the water we want incorporated into the entire mound.

- Your hands by now, are completely covered with sticky dough mixture. It is time to put your hands into the warmed, reserved water. Dip one hand and get the water onto both and put those wet hands right back into kneading, to make a sloshy-sounding mound.

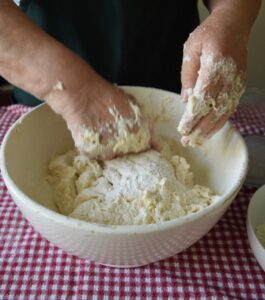
- You go back and forth from actively kneading, to going back to putting your hands into the water, to get the remnant ingredients off of your hands and into the dough. By the halfway point of the kneading process - at about 4 minutes in, you will have gone back and forth to dipping your hands into the water three times. The dough is now slightly too wet. Add a sprinkling of the reserved flour onto the top of the mound, about 1/4-1/2 cup.

- Punch the added flour into the top and then flip the dough around so that the floured top is now at the bottom and the wetness from the bottom comes to the top of the bowl. Knead a little and now it's time to add water to your hands for the 4th time.
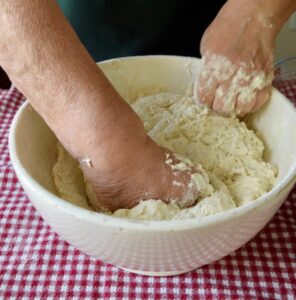
- You are working continuously with wet hands, to get the dough to feel less sticky and so that most everything from your hands gets incorporated into the final dough. Your are punching and flipping. (It's kind of fun but I imagine doing this every day for my family, as it was done generations ago, would be exhausting.)
- This is when your dough will change from sounding super "sloshy" and sticky, and will begin to sound and feel "smackey" as you punch. This is what you want and need and you knead. (See what I did there?) When your hands are sticking to the dough, you know it's time to wet your hands again, to keep this great newly formed feel and sound of the "smackeyness" going.
- You have gone in to dip your hands back into the reserved water for the 5th time, at about 5 minutes into this process. From this point, you'll dip your hands back into the water and go back and forth to knead around every 30 seconds or so, until your job is done. So there will be a 6th, 7th and 8th time of going back and forth until your dough is done being kneaded.
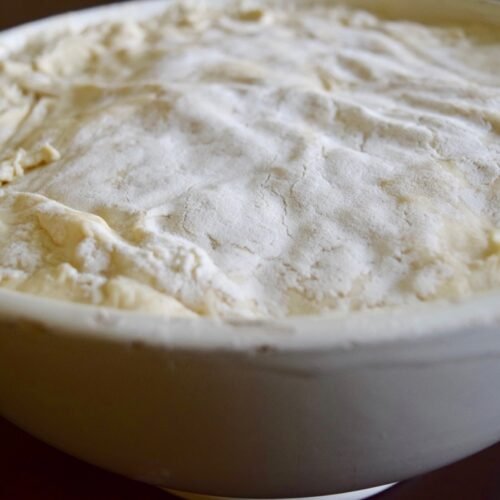
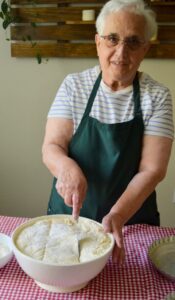
- At 7 minutes in, your dough has been completely kneaded. It is ready. It is releasing from your hands without stickiness. You will now lift the dough and liberally flour the bottom of the bowl. Place the dough on top of this floured surface. Liberally add flour all over the top of the dough.
- (Traditionally, the dough is blessed by placing hands in the form of a cross to the top, to go along with a couple prayers that are said out loud.) Then the entire bowl is covered and wrapped tightly with layers of cloth.
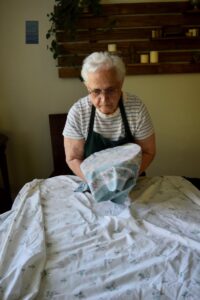
- Keep it completely covered and set aside to rise for one hour. It should be done and ready to work with. If the dough has not doubled in size or you are not satisfied with the results after checking it, you can wait an additional 30 minutes to see if it rose any more. If it did not rise at all, your dough was not successful and I don't recommend cooking or baking with it.

- If your dough has risen, you are ready to bake or cook with it right away. Please see my summary notes at the top of this recipe for refrigerating or freezing instructions.
Video
Notes
For the video to watch me put this Master Dough together with the first time, along with the instruction of my mom - who is a Nonna from Italy herself - please cut and paste, or go to this link, from the Glorified Hobby YouTube Channel:
https://youtu.be/Bl9pQ7ZLVr4