Mili's Best Biscuits - classic buttermilk and vegan and gluten free
This recipe makes biscuits so good, they can be served along your best meal on Thanksgiving, or they can upgrade the taste of the simplest everyday dinner or breakfast at home. Here we're making classic buttermilk, and offering switch outs for vegan and gluten free alternative ingredients.
Ingredients
- 2 cups all purpose flour. (I'm using King Author.) For GLUTEN FREE: switch the same amount for gluten free baking flour. (I'm using Bob's Red Mill.)
- 4 teaspoons baking powder
- 4 tablespoons salted butter cold and cut into pats or cubes. For VEGAN: use the same amount of vegan, alternative butter. (I'm using Earth Balance Original.)
- 1 cup buttermilk For VEGAN: pour one tablespoon white vinegar into a glass, with one cup of original Soy Milk on top. Let stand for five minutes, allowing the milk to curdle like buttermilk.
Instructions
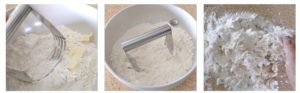
- Preheat your oven to 450 degrees.Prepare a cookie sheet with a silpat mat or parchment paper.In a large mixing bowl, combine the dry ingredients.

- Place the butter on top of the flour mixture. I use a dough/butter cutter to cut the butter into the flour. This is a great and inexpensive tool you should have on-hand if you love making biscuits or scones. If you don't have this tool, no worries. Cut the cold butter into small, pea sized cubes, and place them into the fridge until you're ready to make the dough. Once you're ready, place these cut pieces onto the flour, and use your hands to quickly rub the butter pieces into the dry ingredients. Don't over-handle. You want to try to get these bits mixed in so that the butter stays cold. Do this task quickly since for best results, the butter should stay firm and not melt. Create a well in the center of your bowl and pour in the chilled buttermilk. With your hands, mix in the buttermilk so that it's all combined.
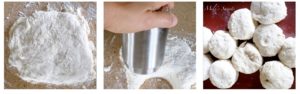
- In the bowl, you'll get the dough totally incorporated. fold the dough onto itself at least three times. If you have some flour on your hands or you have saved a little reserved flour, place a pinch and rub onto a flat surface. Fold again onto that surface and with your hands create a mound that is about one to one and a half inches thick and even. This makes for lots of nice air and flaky layers in your biscuits. Wash your hands and start cutting your rounds. I have used lots of different cutters in the past. A round cookie cutter works well. However, I found that my son's school-lunch thermos works best. It allows for the serving size I prefer (about 1.5") and I like how tall it is, so that I don't have to compromise the height of the biscuit when cutting. With your cutter, press straight down and through the dough. Place biscuits onto your prepared baking sheet so that they are just touching. You'll notice that your first cuts will be your best biscuits and the ones you cut with the scraps/remnants will not come out as well. That's OK. There's no sense in waste and no one will complain!
- Bake for 15-20 minutes (depending on your oven) or until the biscuits are very golden at the top and cooked through with a slightly golden color at the bottom. There should be no moisture seen from the outside.
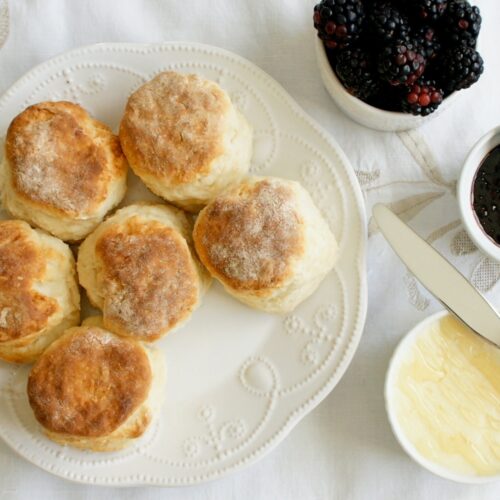
- end result for classic buttermilk will look something like this:

- end result for biscuits made both vegan and gluten free will look something like this:
