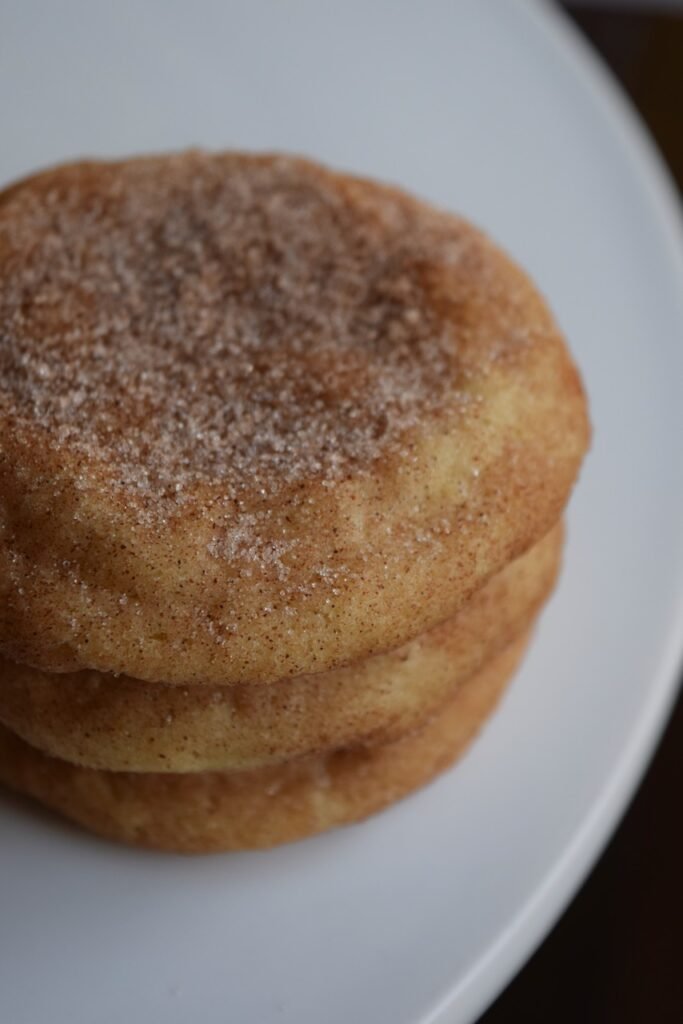
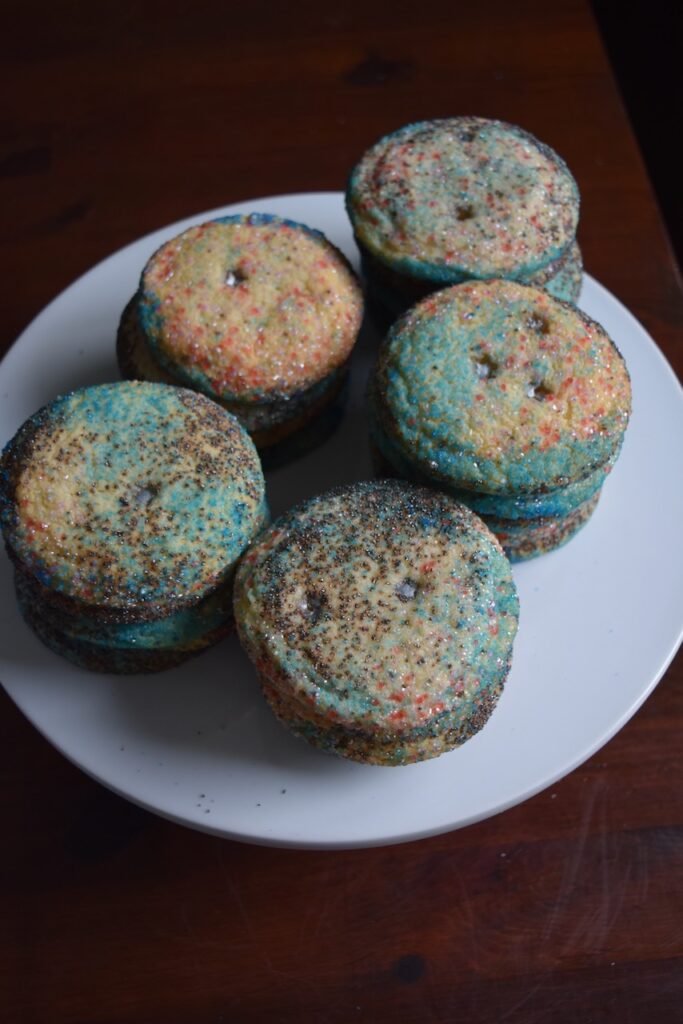
With a simple-sprinkle dip just on the outside, or completely packed for a B-day Sprinkles inside and out, I’m always at my go-to Vanilla Cookie recipe with an awesome end-result: some crinkling, and a bake that is soft and chewy on the inside, with a golden crisp on the outside.
I share switch-out notes to make this recipe dairy free and/or vegan, and share my pro-tips about using the same cookie-puck prep in your home kitchen, that I use for professional baking and dessert catering via Mili’s Sweets.
This is a wonderful, beginner-baker recipe that is sure to be a keeper, and made over and over again.
There are many creative ways to use my recipe! This is the same base I use for Snickerdoodles, Matcha, Vanilla Chai, Blondies, and more.
It’s time I introduce you to my notes and the pro-tip world of cookie-puck prep.
cookie pucks
Let’s talk “cookie pucks.” I’m sharing the prep method for cookie baking that is super convenient for use in either professional catering or home-baking.
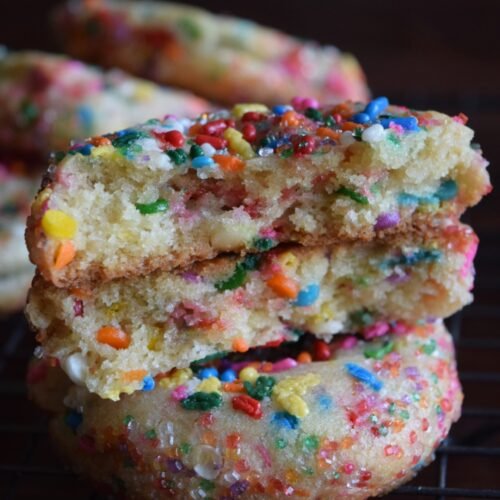
Vanilla Sprinkle Cookies
Ingredients
Batch of Cookies
- 1 cup salted butter (8 oz or two sticks of classic butter, or if you need dairy free, use vegan butter.
- 2 cup granulated sugar
- 2 whole eggs use an 1:1 egg substitute if you need egg-free or vegan
- 1/2 teaspoon cream of tartar
- 1/2 teaspoon baking soda
- 1 teaspoon pure vanilla extract To make them extra special, add one additional teaspoon of vanilla bean paste, or a 1/4 teaspoon of vanilla bean powder
- 1 teaspoon salt
- 3 cups all purpose flour (make it gluten free by substituting for a 1:1 ratio blend)
Sprinkles on outside only *
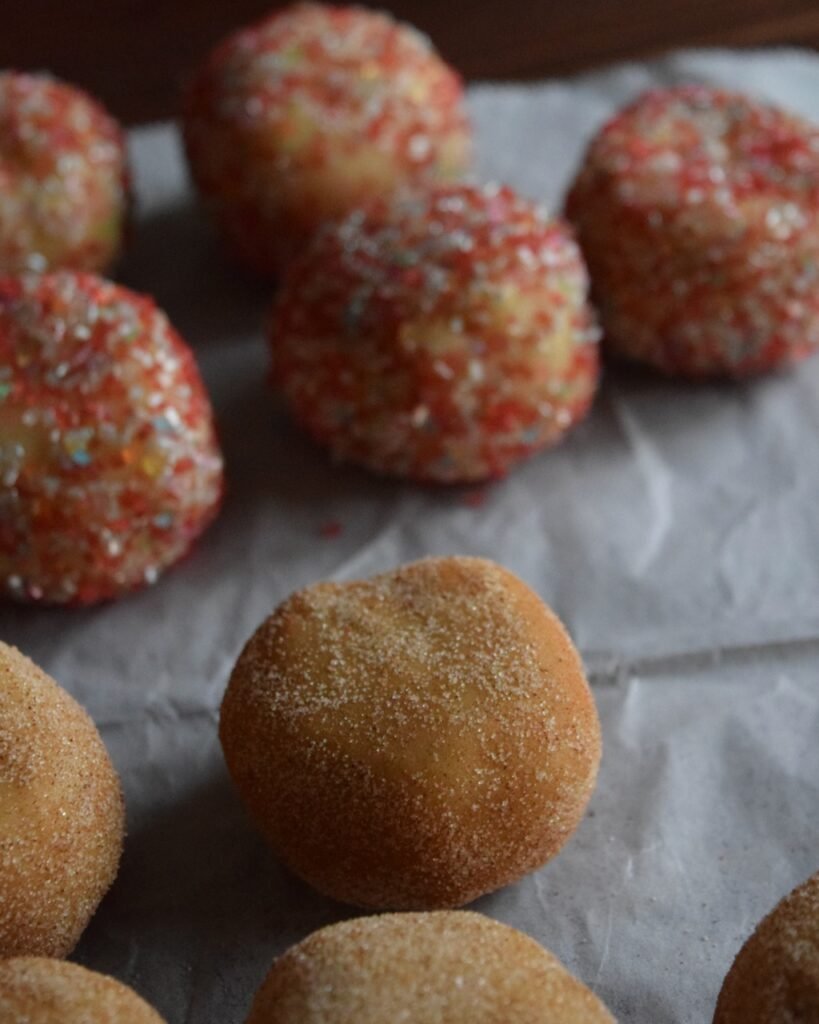
- 1/3 cup assorted sprinkles for cookie "puck" dipping before baking For the holidays, I use sugar-sprinkles only.
- 3 tablespoons for full coverage, sprinkle some to the top, while the cookies are still hot from the oven. Most will adhere to the cookies while cooling.
B-day Sprinkles inside and out
- 1/2 cup assorted sprinkles Mix assorted sprinkles into your batter. The best outcome are colorful jimmy and confetti sprinkles. Sprinkles are typically vegan
- 3 tablespoons for full coverage, sprinkle some to the top, while the cookies are still hot from the oven. Most will adhere to the cookies while cooling.
* look at your sprinkles ingredients to make sure they are made according to your preferences. Not all sprinkles are nut free, dye-free, vegan, or dairy free. Find a maker of sprinkles in a facility and recipe-type that works best for you.
Instructions
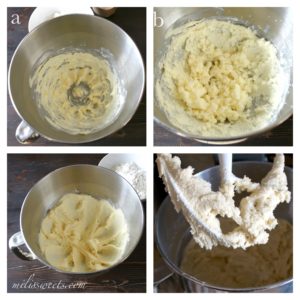
- Allow butter to be softer to the touch, but not melty. Beat butter until it completely covers the bottom of the bowl in your standing mixer. (I used the standard, metal, flat beater attachment.)

- Mix in the sugar, baking soda and cream of tartar.
- Add eggs, one at a time, plus pure vanilla. Mix until combined. Scrape bottom to be sure all ingredients are incorporated evenly.
- Mix in the flour – either all purpose or gluten free.
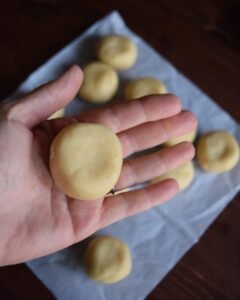
In order for the dough to be manipulated into balls that can be rolled and dipped before baking, it needs to be refrigerated. Place in a bowl, cover with plastic wrap and refrigerate for at least one hour. You can chill overnight. When it's ready, it's easy to scoop and form. I used a heaping, table utensil spoon, for the portion sizes of each cookie.
- Now it's time to prepare what we call "cookie pucks" in dessert catering. This allows even servings and time-saving for fresh-baking. What the Puck? I love pucks for work or for home baking, because you have ready-to-go, on-demand cookies from freezer/fridge to oven at anytime. How to Puck:For Vanilla Cookies made via Mili's Sweets, I glove my hands and create my puck-shape by measuring each heaping tablespoon so that they are about 1.75 oz. each. They are rolled to be rounded and shaped flat at the top and bottom (imagine a little hockey puck). This effort helps me get the end-baking result I want for this recipe. Measuring also helps me manage rendering 24 "small bake" cookies from a single batch. From my work-catering menu, the definition of small-bake are typical, about palm-sized servings that you'd expect from an average home-bake cookie.If you're ready to bake: After prepping, you'll want to put all the pucks back in the fridge for another 30 minutes or so, because your hands have warmed the butter. I typically "puck" a day before baking.If you're not ready to bake or want to save some for later: Cover and seal your pucks and refrigerate for a few days. Freeze for up to a month. If you choose to freeze, put them in the fridge to get them to a proper temperature, before covering in sprinkles and baking.

now you're ready to bake
- Preheat your oven to 350 degrees. For my home oven, I prefer to place my rack either in the center, or one slot below the center. I let my oven stay preheated for about 10 minutes before opening it.To bake, I use a baking sheet with a "silpat mat" over it. This is the best result for me. I personally do not prefer using parchment paper or only a non-stick surface for cookie-baking.I bake 6-8 pucks at a time. I rotate two sets of cookie sheets while cookie-baking so that one can cool while the other one is in the oven.
let's dip
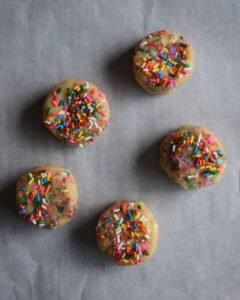
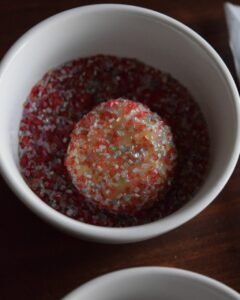
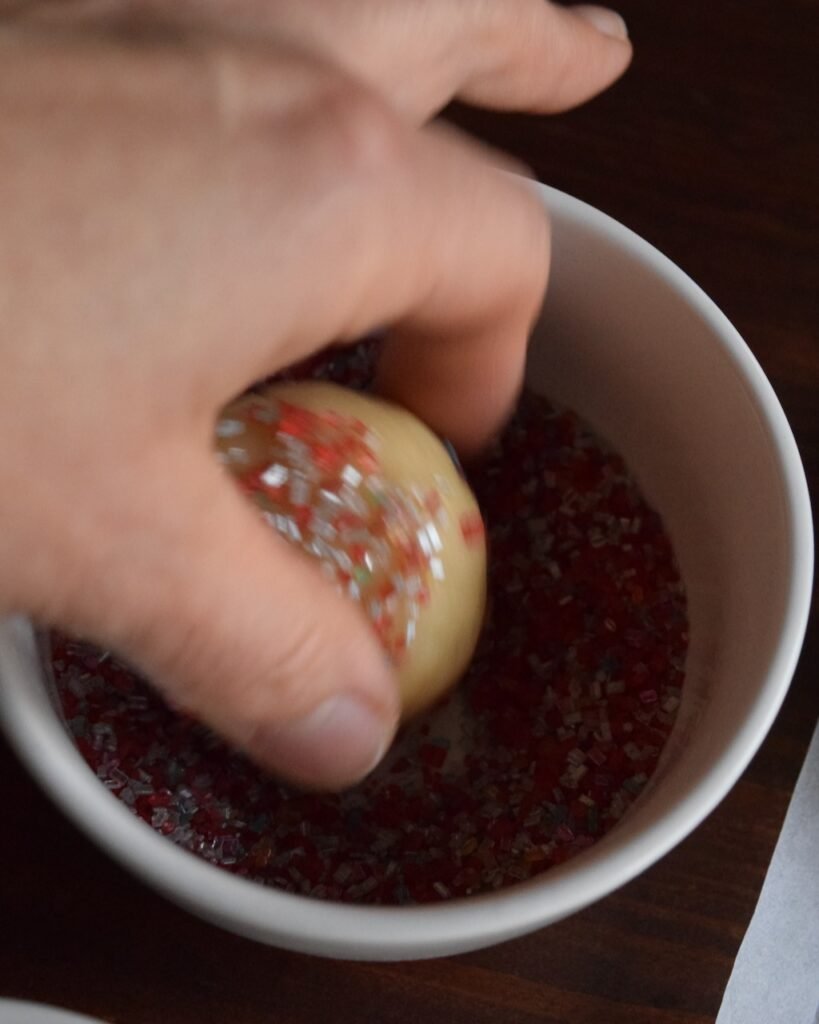
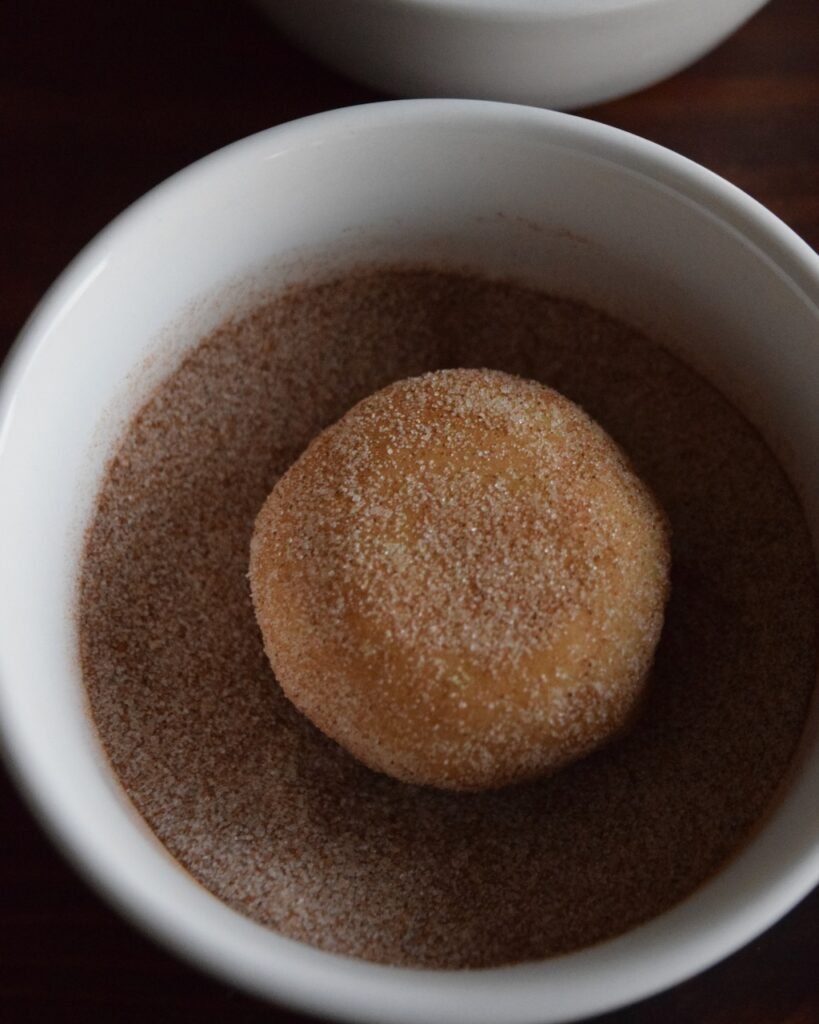
- I do not like freezing outside-sprinkles in my baked goods, because in my opinion, it compromises them. So, I will dip my pucks in outside sprinkles of refrigerated picks before they go into the oven. Once first round are baking, I dip the rest and keep them in the fridge until it is time for them to be baked.
- Place your sprinkles of choice in a small bowl. You can go all textured sugar or go with a fun mixture of what I call 'B-day sprinkles' where you mix and match according to what you like best.
- Dip your pucks in the sprinkles: top, bottom, all around!
- Bake for the first 10-12 minutes. Check them. For work, I want them to all look round so I will take them out and use a spatula to form any edges. You can also use a large round cookie cutter to form the cookies but I have had fails so I stopped this method. My home oven lags a bit, so it takes about 14 minutes to be finished with dough cooked and a nice golden at the bottom.
- What the best sprinkle-coverage? While the cookies are hot and strait from the oven, use your hand to add more sprinkles to set at the top as they cool, since many will spread through the baking process.
- Allow the cookies to cool completely before tasting or storing. Store in a sealed container. These cookies are still so tasty after a week, but day-of or next day us the best of the best.


How about Snickerdoodles?
If you love Vanilla Cookies, see my recipe post all about Snickerdoodles, using this same and simple base recipe.
For our Christmas tree decorating at home this season, I baked both Snickerdoodles and Vanilla Sprinkle cookies for my family, and the Vanilla Sprinkles with a simple sugar mix were completely wiped out! I promised to bake more.

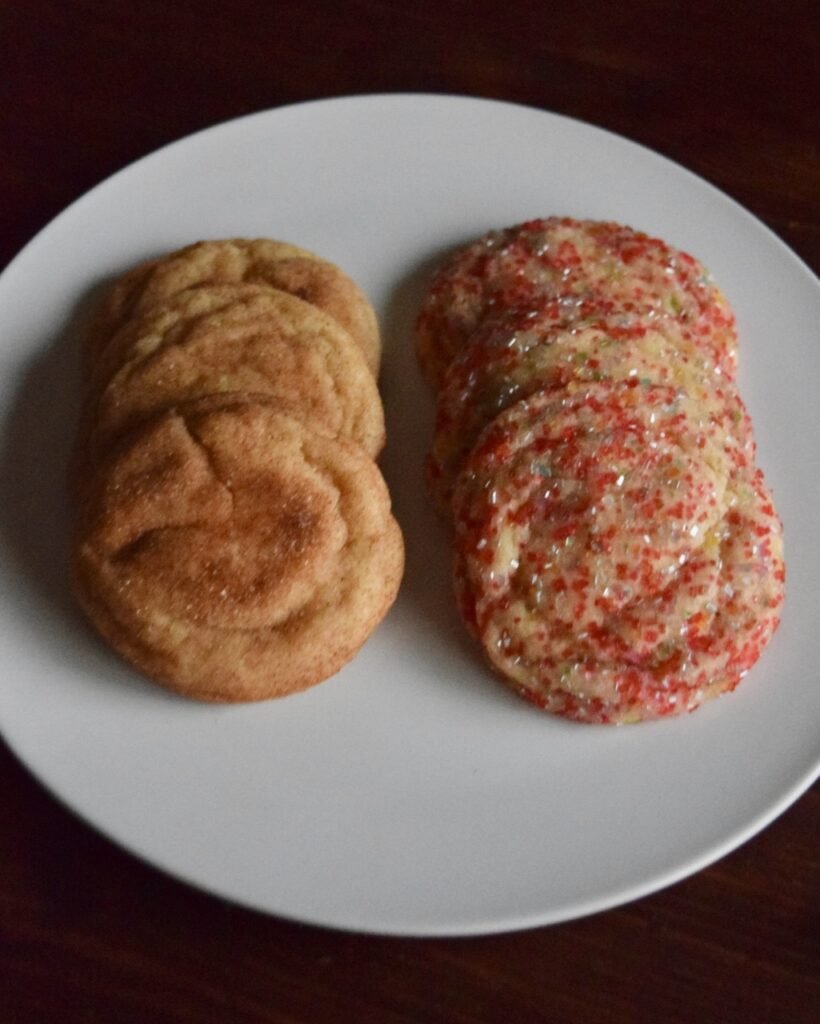

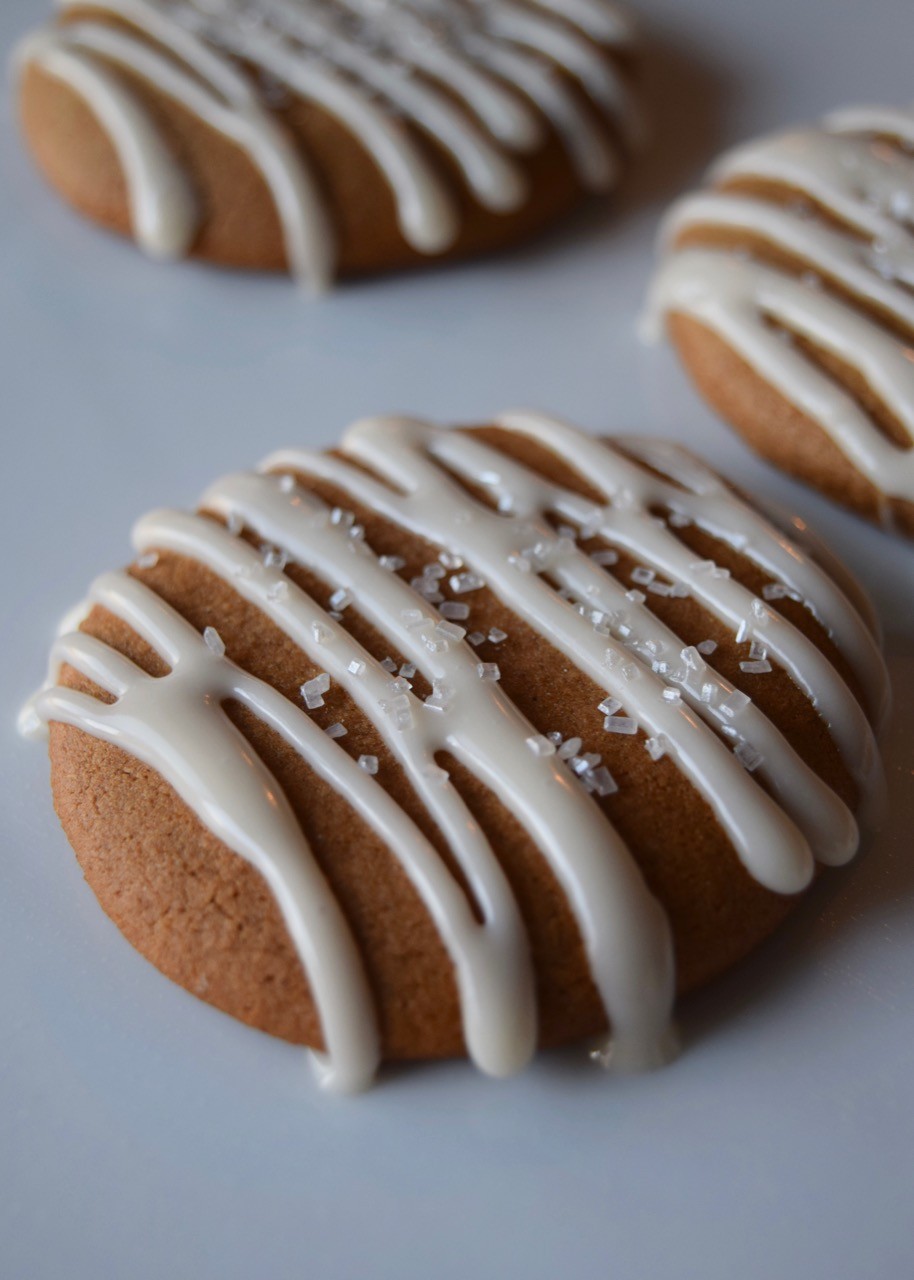
For the holidays, I prefer the taste with just the sugar-sprinkles on the outside – no icing.
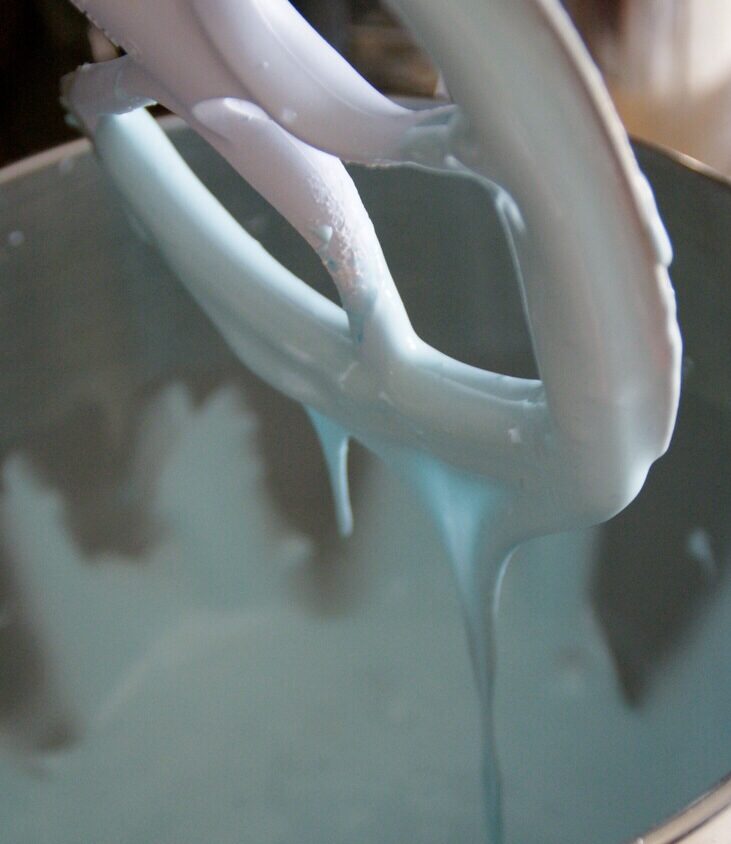
If you would like to top these cookies with icing, I recommend one of my three different icing recipes: royal, easy-set, or vegan.

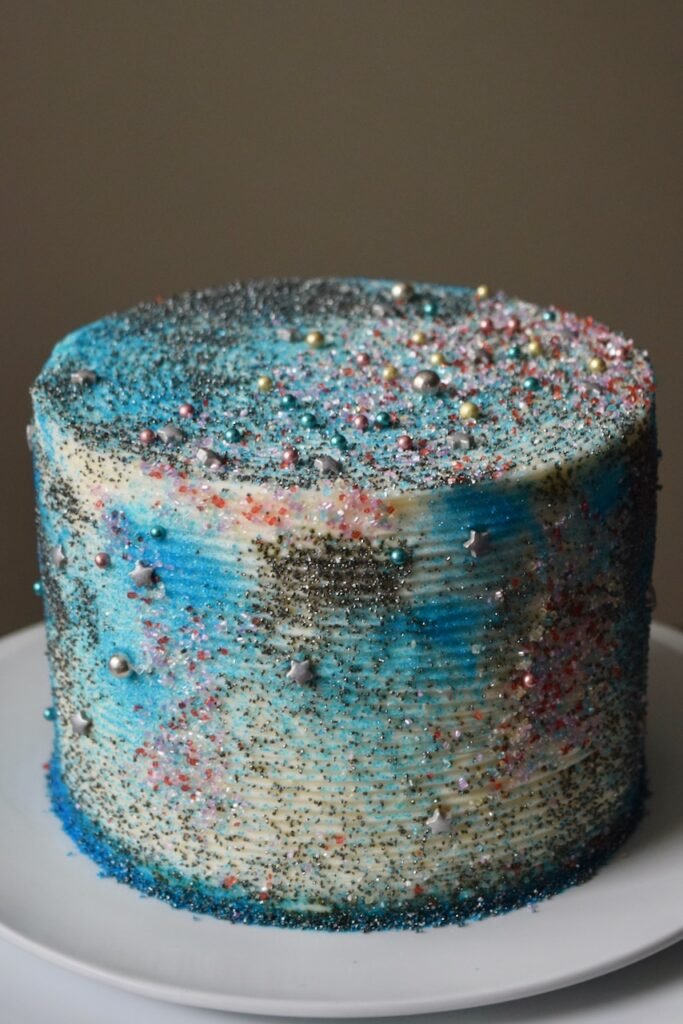
For one of my son’s birthdays, I made him a “galaxy” cake using this Vanilla Sprinkle Cookie recipe, with dipped sprinkles, to match the sprinkled-cake. We all loved how these turned out!
Did you make this recipe? Did you enjoy it? Please help others to see it and try it, by providing a positive review!
Thanks for being here. Take care,