This recipe takes me back to my childhood. Being raised as a first-generation American in a great big Italian family, meant there were many old-country recipes being cooked and baked around me at all times. If it’s possible to duplicate or enjoy the past, to bring back good memories and authentic flavors, then I’m all in.
I found scratchings of an old Italian recipe and followed it. The chemistry wasn’t there to make it work and it failed. I modified it until this dream of a cake happened. It’s simple and dead-on for flavor and texture.
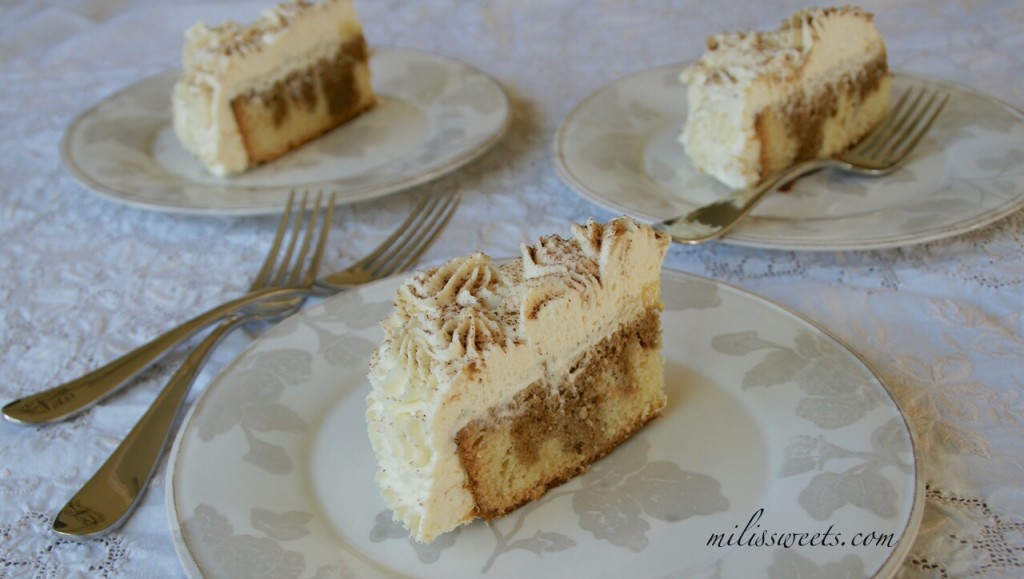
Real Italian sponge cake is a lot like biscotti/sweet bread. The crust is full of flavor. The outer edge has a smokier texture but is soft and easy to cut through. It tastes a lot like biscotti. It’s not overly sweet and soaks in any flavor you can pour into it. The texture inside the cake is bouncy and lovely. I love it!
I’m sharing two versions of this cake: Tiramisu-Sponge and a Strawberries & Cream Sponge.
The flavor possibilities are endless with this recipe! It’s all about preparing what to soak-in. I can see making a Paradise Sponge with either passionfruit puree or pineapple sauce. An Orange Dream Sponge would be next on my list. I’d even love this cake soaked with dulce de leche or tres leches.
Let’s start with the base.
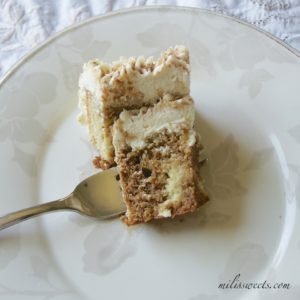
Mili’s Authentic Italian Sponge Cake: Tiramisu or Strawberries & Cream
Ingredients
sponge cake
- 6 eggs separated 6 egg yolks, 6 egg whites
- 1/4 teaspoon cream of tartar
- 1 cup granulated sugar
- 1 cup canola or avocado oil
- 2 and 1/2 cups all purpose flour
- 1 teaspoon baking powder
- 1/2 teaspoon baking soda
- 1/4 teaspoon salt
- 1 and 1/2 teaspoon pure vanilla extract
adding Tiramisu
- 1 cup fresh brewed espresso
- 1/2 cup amaretto syrup
- 1 batch of fresh-made and hot vanilla custard or pudding optional
- 2 batches of prepared whipped cream Mili’s recipe found via www.glorifiedhobby.com.
- 2 tablespoons sweetened cocoa for dusting
adding Strawberries
- 2 cups fresh cut strawberries, smashed by hand
- 1/2 cup granulated sugar
- 2 batches of fresh-made and hot vanilla custard or pudding optional
- 1 batch of prepared whipped cream
Instructions
making the sponge cake
- Preheat your oven to 350 degrees.
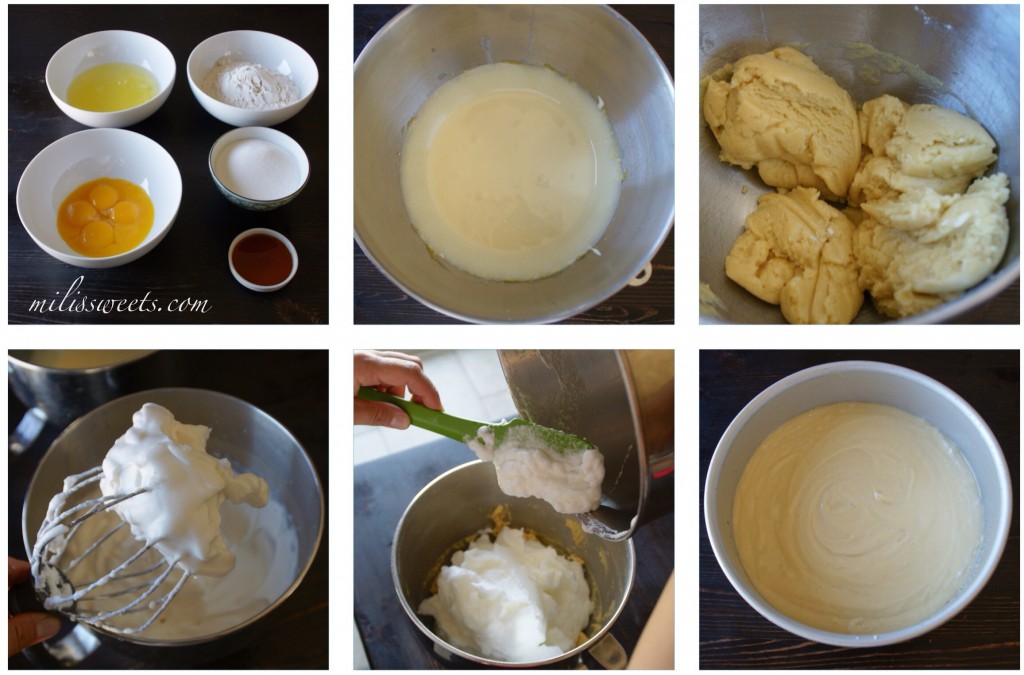
- Separate 6 large eggs so that you have 6 yolks and 6 whites. Set the egg whites aside. In the bowl of your standing mixer, place the egg yolks and sugar. Mix with the paddle attachment until smooth and fluffy (1 minute). Add the one cup canola oil and pure vanilla extract. Mix until completely incorporated.
- Slowly add the remaining dry ingredients, including baking powder, baking soda, salt and flour. The result will look a lot like choux pastry dough. Set this cake “dough” aside as you make a meringue with the egg whites.
- In a separate bowl, with a whisk attachment, add the egg whites and 1/4 teaspoon of cream of tartar. Whisk on high until stiff peaks are formed.Add the mound of prepared meringue onto the cake dough mixture. Mix these together with a paddle attachment until completely smooth. It will take two-to-three minutes for the meringue to break down into the dough, to make a perfectly smooth cake batter.
- I used one 8″ cake pan, and prepared it with cooking spray before pouring all of the batter in.Bake for 50 minutes.This cake definitely takes longer to bake than most other cake recipes. Don’t open the oven until at least 30 minutes have passed. Once your cake tester (skewer or toothpick) comes out clean, you can remove the cake from the oven.
- It will look a lot like rustic bread at the top – harder than a typical cake and very golden. Don’t worry. That’s what’s suppose to happen. Think biscotti on the outside and fluffy cake on the inside. You’ll have to trust me, even though the result might seem like it’s over-done, it’s not the case.
Making it a Tiramisu Sponge
- Optional: Prepare either custard or vanilla pudding while the cake is baking, and set aside. Cover so that it’s still hot, but there is no film set on top, when you’re ready to pour over the cake layer.
- Cut off the top of the cake, to have one even layer. I don’t allow the cake to completely cool. It’s really not necessary since I pour on hot toppings, and the cake is easily removed from the pan. If you can’t handle the heat, wait until the cake has completely cooled. When you’re ready, place the cake on a serving dish. Use a fork to create additional holes in the cake.
- Mix together the espresso mixture and amaretto syrup, and pour onto the top of the cake.
- Next, pour the prepared (and unset) pudding or custard onto the soaking cake to completely cover the top. (For this example, I used vanilla pudding with the extra amaretto syrup.) Place plastic wrap over the entire cake and allow to set in the refrigerator until you are ready to cover/frost with whipped cream.
- Top it with a dusting of sweetened cocoa before serving.
Making it a Strawberries & Cream Sponge
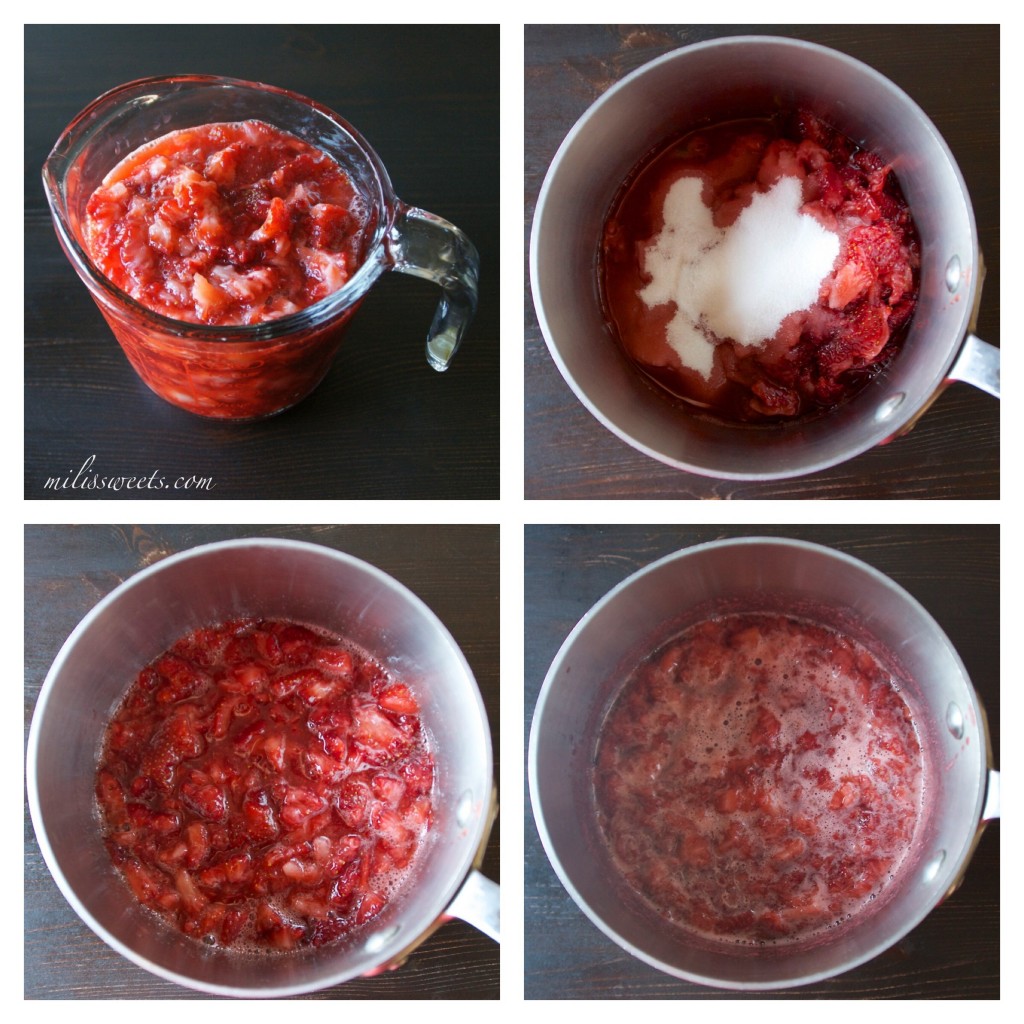
- Take the fresh strawberries, thoroughly wash them and remove the tops. Smash them with your fingers to cut them up, breaking them down and releasing their juices. Keep smashing until you have two full cups.
- Place the smashed strawberries and sugar in a saucepan. Cook at medium heat for 15 minutes. Stir from time to time, once the mixture comes to a boil.
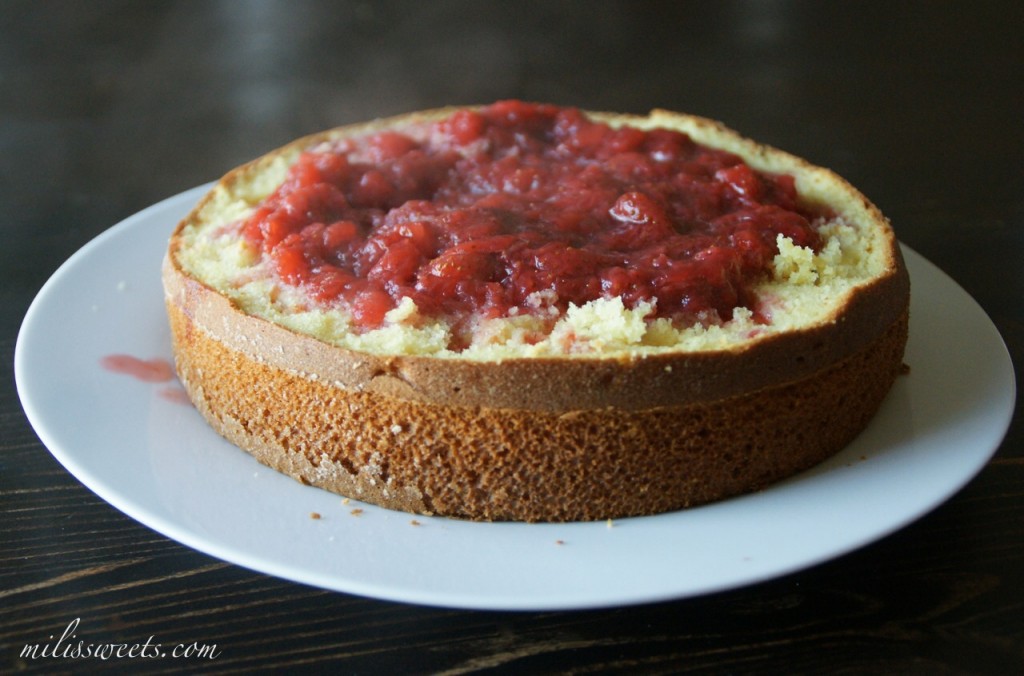
- When you are ready to assemble the Strawberries & Cream Sponge, remove the top of the cake with a serrated knife, to have an even layer. Use a fork to create additional holes in the cake. Pour the hot Strawberry Sauce onto the cake layer. Use the fork to push the fruit down, into the holes.
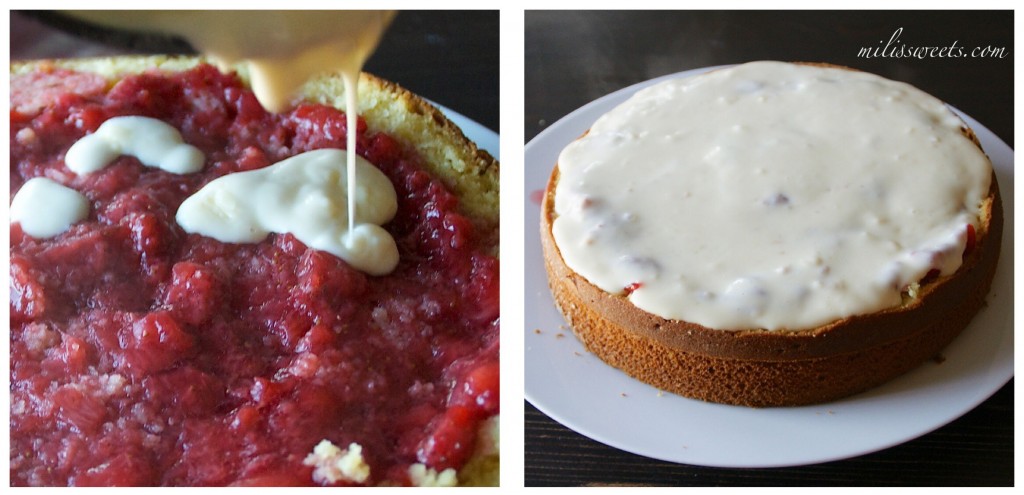
- Next, pour the prepared (and unset) pudding or custard onto the soaking cake to completely cover the top. (For this example, I used custard.) Cover the entire cake with plastic wrap and place in the refrigerator to set. When it has completely chilled and set, cover with fresh vanilla whipped cream.
Here’s what you’ll do:
Preheat your oven to 350 degrees.
Separate 6 large eggs so that you have 6 yolks and 6 whites. Set the egg whites aside. In the bowl of your standing mixer, place the egg yolks and sugar. Mix with the paddle attachment until smooth and fluffy (1 minute). Add the one cup canola oil and pure vanilla extract. Mix until completely incorporated.
Slowly add the remaining dry ingredients, including baking powder, baking soda, salt and flour. The result will look a lot like choux pastry dough. Set this cake “dough” aside as you make a meringue with the egg whites.
In a separate bowl, with a whisk attachment, add the egg whites and 1/4 teaspoon of cream of tartar. Whisk on high until stiff peaks are formed.
Add the mound of prepared meringue onto the cake dough mixture. Mix these together with a paddle attachment until completely smooth. It will take two-to-three minutes for the meringue to break down into the dough, to make a perfectly smooth cake batter.
I used one 8″ cake pan, and prepared it with cooking spray before pouring all of the batter in.
Bake for 50 minutes.
This cake definitely takes longer to bake than most other cake recipes. Don’t open the oven until at least 30 minutes have passed. Once your cake tester (skewer or toothpick) comes out clean, you can remove the cake from the oven.
It will look a lot like rustic bread at the top – harder than a typical cake and very golden. Don’t worry. That’s what’s suppose to happen. Think biscotti on the outside and fluffy cake on the inside. You’ll have to trust me, even though the result might seem like it’s over-done, it’s not the case.
You’ll see my notes for how to put either flavor combination together. First for Tiramisu. Typically, amaretto is an almond-based liquor or flavoring. I achieve all of this flavor, in a nut-free way but using Torani syrup. I must have a completely peanut and tree nut-free kitchen, and this rich, delicious flavoring does not contain peanut or tree nut products. Please see the Torani allergen chart for more information.)
Here’s what you’ll do:
Prepare either custard or vanilla pudding and set aside.
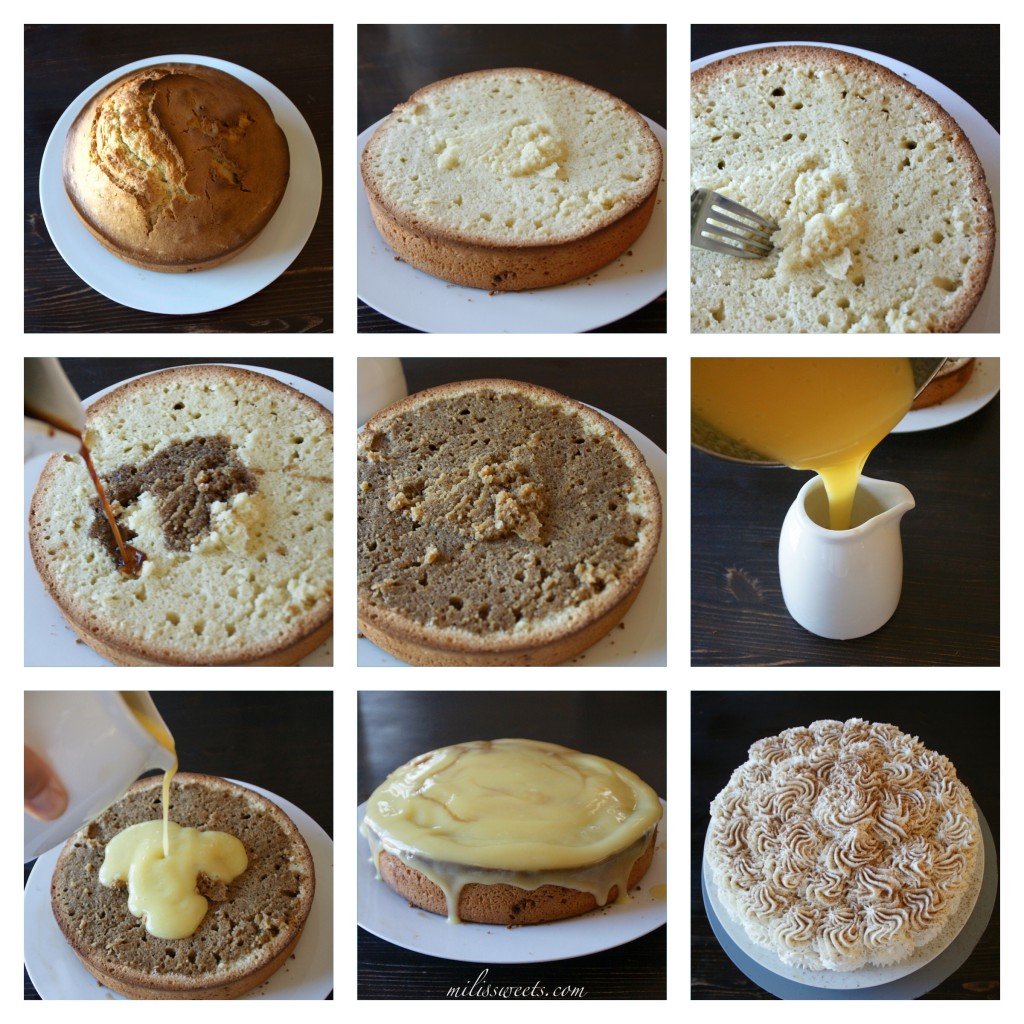
Cut off the top of the cake, to have one even layer. I don’t allow the cake to completely cool. It’s really not necessary since I pour on hot toppings, and the cake is easily removed from the pan. If you can’t handle the heat, wait until the cake has completely cooled. When you’re ready, place the cake on a serving dish. Use a fork to create additional holes in the cake.
Mix together the fresh brewed espresso and amaretto and pour this mixture onto the cake layer.
Next, pour the prepared (and unset) pudding or custard onto the soaking cake to completely cover the top. (For this example, I used vanilla pudding with the extra amaretto syrup.) Place plastic wrap over the entire cake and allow to set in the refrigerator until you are ready to cover/frost with whipped cream.
Please see this link for my simple vanilla whipped cream recipe.
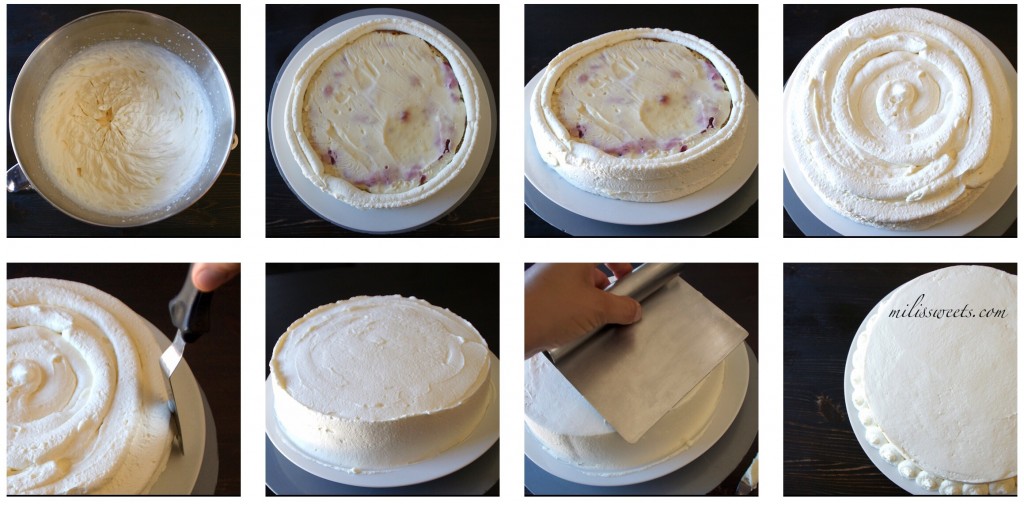
For my tips on how to frost a cake with whipped cream, please see my tutorial photos at the bottom of this post.
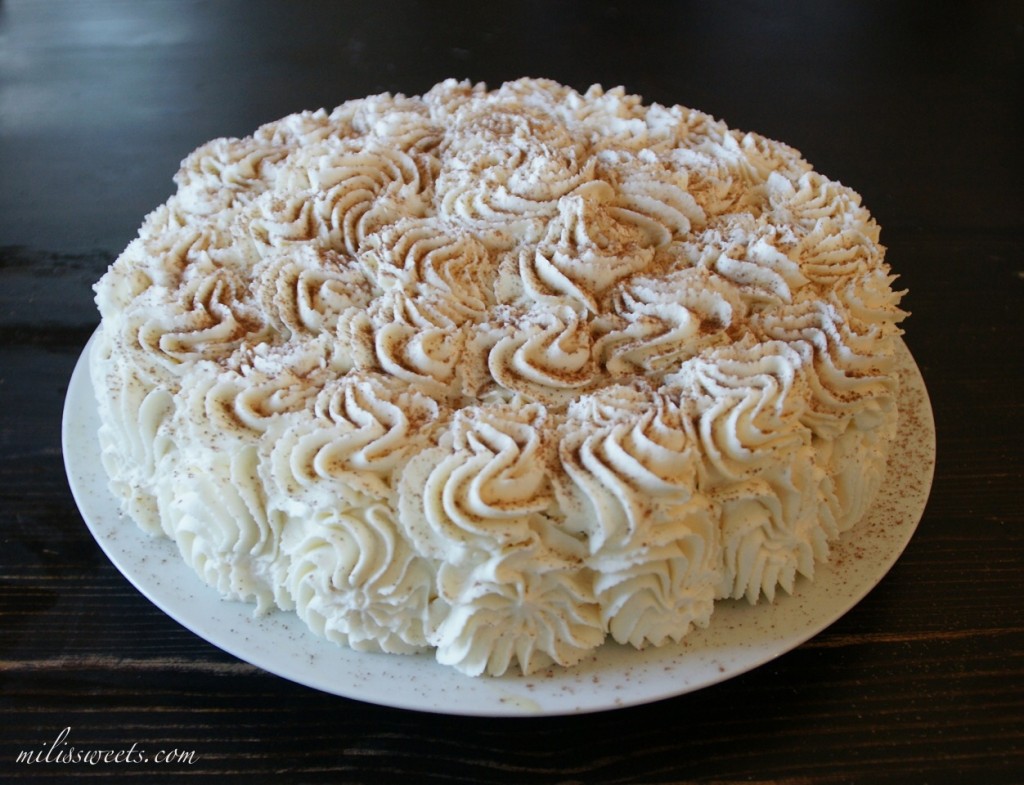
I used a large, open star-tip to frost the whipped cream onto the cake, by making small, circular piping motions, (like piping mini cupcakes, one at at time) covering the cake from the base and moving upward, until the last one was made at the top-center.
I topped the Tiramisu Sponge with a dusting of cocoa powder before serving.
Now for how to make this a Strawberries & Cream Sponge.
First, you’ll need to prepare fresh Strawberry Sauce. As per the attached recipe, you’ll cook this down and have it ready-made while your cake is baking.When you are ready to assemble the Strawberries & Cream Sponge, remove the top of the cake with a serrated knife, to have an even layer. Use a fork to create additional holes in the cake. Pour the hot Strawberry Sauce onto the cake layer. Use the fork to push the fruit down, into the holes.
Next, pour the prepared (and unset) pudding or custard onto the soaking cake to completely cover the top. (For this example, I used custard.) Cover the entire cake with plastic wrap and place in the refrigerator to set.
How to Frost a Cake With Whipped Cream
Once the custard or pudding has set in the refrigerator, you can frost the cake with whipped cream.
Here’s how I covered the Strawberries & Cream Sponge:
I take a circle-tip (Wilton 1A) and fill a 16″ or 18″ pastry bag. I start at the bottom base of the cake and apply pressure to the pastry bag to evenly pipe from the bottom-up. Using a turntable/revolving cake decorating stand will be your best friend when applying any frosting to cakes. Once you reach the top edge, pipe the top portion, with a mostly-even, circular motion.
With an offset spatula, I use the cake plate as a guide and smooth the sides. I then smooth the top. I take the spatula and cover the sides one more time, pushing the excess up to the top. Next, use a pastry scraper to push (with a slight amount of pressure) and smooth the edges toward the center of the cake.
Top the cake with a garnish of fresh strawberries, or if you have extra Strawberry Sauce, you can blend it until smooth and cook at medium heat for an additional 15 minutes, stirring constantly, for a lovely, thicker sauce to drizzle and decorate the cake.
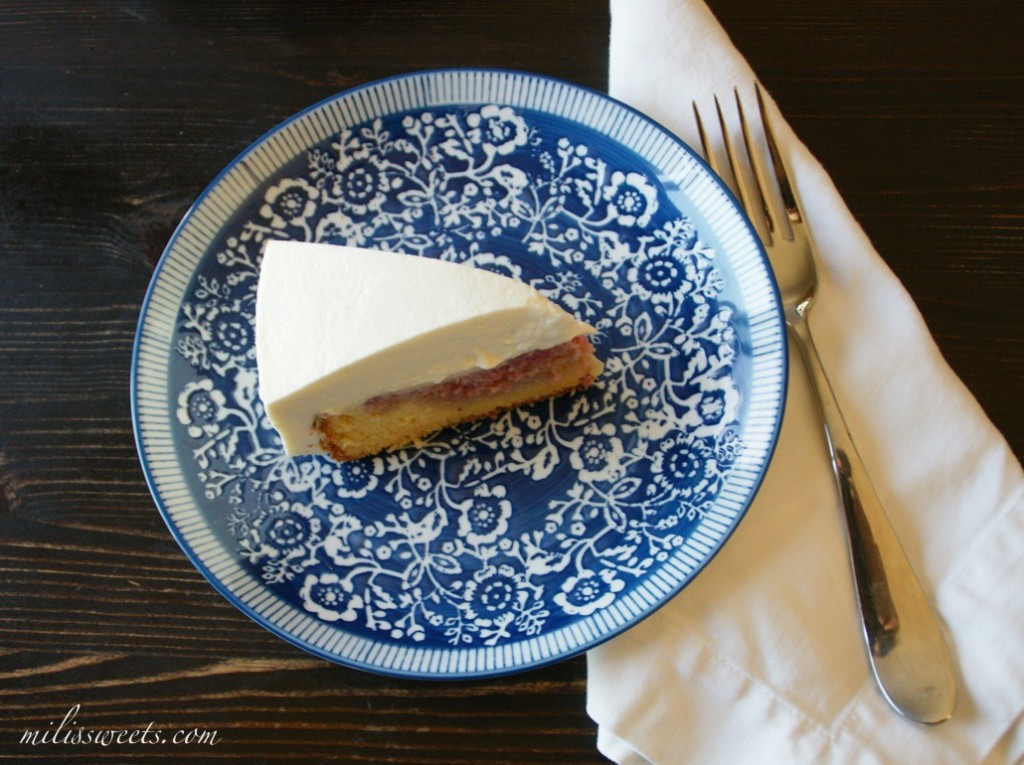
The inside of Sponge Cakes should be soft, delicious and flavorful. Nothing about the cake will be overly-sweet, and the whipped cream is the perfect, delicate topping for any flavor you decide to soak into the sponge.


